DJI Phantom 3 Advanced
Phantom 3A based mapping
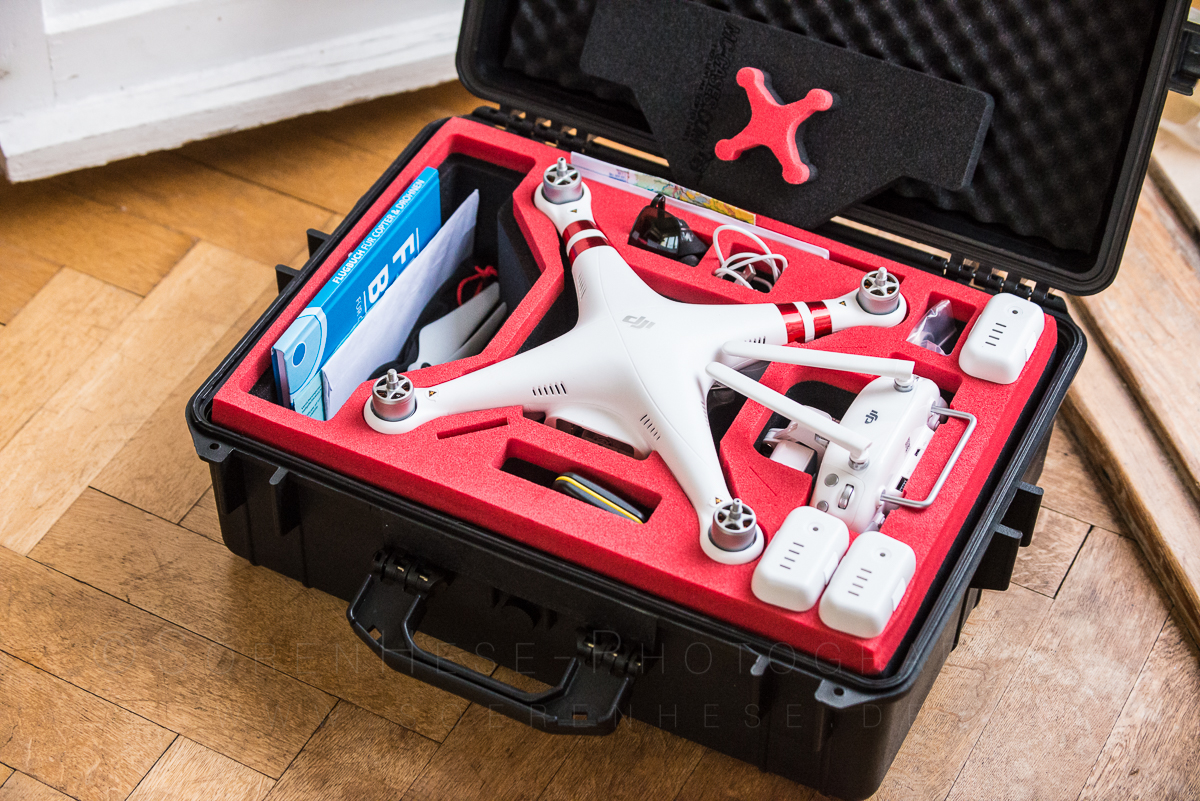
Fig.: Phantom 3 A in an MC case (btw: nice case but be aware that this old case system has been updated now by MC, this old version for the P3A seems to loose occasionally the center of the hinge – some special glue helps easily here).
Late this year I bought a Phantom 3A (Advanced). The prices went down and these platforms are so affordable now that it makes sense to test it out.
The Phantom 3 is really easy to control. Some basic theory about controlling a quadro-copter should allow everyone to control these devices with some practice. This is mainly due to the perfect GPS controlled position hold of the Phantom. It just stays where you put it (in opposite to gliders) and this makes it also kind of boring to fly a copter. Some more experience is needed in very cold environments and when flying with strong winds. Wind speed can also be different at different altitudes – this can decrease you flight times considerably – it can even stop the copter from flying back to its starting point. For visually controlled flights more that 200 m distance is not advised because it quickly gets difficult to fly the copter controlled back to its start position when the pointing direction of the copter isnt clear anymore. The DJI GO app that is used on a mobile device to check the telemetry data and to control the lifeview provides a nice overview about position, viewing angle and overall status of your copter. You can also modify shooting parameters, change the camera viewing direction and check speed, height and remaining flight time, battery status and the number of GPS satellites. Other apps support fully automatic mapping modes with variable overlap configurations („Data Mapper„ or “Drone Deploy” and others).
Some DJI Phantom 3 A Specs:
- Image Data capturing in 12MP Adobe DNG RAWs, gimbal stabilized! & damped. 2. HDR with 5 exposures each 0.7EV under/over-ex-> RAW DNG HDR computation. 3. Sony EXMOR 1/2.3“, 12.4MP, 94°lens (20mm focal length equiv. tilt.), ISO100-3200, 8-1/8000s, single shot, multiple shot, exposure series (3/5), DNG RAW format, video: FHD upto60p, 2.7k upto30p, 4. Memory: MicroSD up to 64GB cat10.
- Control: GPS/GLONASS controlled position hold, visual Realtime-Position-Tracking (VPS – Vision Positioning System) up to 3m flight alt. (P4pro: 10m). RTH (Return to Home Funktion), Battery Low RTH, Security-RTH, software controlled flight altitude (override possible): 120m, autostart/-landing, beginner modi, (OrbitModi/anti- collision (infrared/ultrasonic)/ActiveTracking/terrain follow: P4/pro/Mavic), P-GPS – GPS controled stabilising (+/-10cm position), P-OPTI (optical position control & stabilizing), P-ATTI modi (flight altitude only (barom.) – copter could start to drift).
- Flight parameters: weight: 1280g, climb: 5m/s, descend: 3m/s, Vmax: 16m/s (ATTI) – 60km/h, flight altitude max: 6000 m (airspace above 100 m needs a clearance (approval), RC max distance: 5km, flight time: 23 min (30min: P4pro), RadioControl: 2,4khz RC with iPad/iPhone (build in DJI Lightbridge System), realtime lifeview control per DJI GO App.
As easy as handling goes the paper work involved is at the time of writing already making things more difficult than some years ago. First obviously an insurance is needed for all kind of copter flights – doesnt matter if you fly private or for a client or for a scientific/research purpose (this hasnt change). You need an insurance! The other paperwork sub chapter is the flight allowance for the country you want to fly in. In Germany its the regional government where you apply for a license. So if you plan to fly in Berlin you need to get a different allowance than when flying in Mecklenburg-Vorpommern. The regulations are more or less the same and costs are comparable (140-160 per two-year). In Berlin you only get event specific allowances. You in fact can only fly at a specific defined day (and that day might be rainy or foggy … ). New regulations for copter flying will make this likely more complicated. Some people did not accept the 100m altitude limit and created dangerous near misses in restricted areas.
Using the Phantom 3 – the image data is indeed „acceptable“ when you blow all whistles and do careful post processing. Thats exactly how others have put it and I would adjoin to use the word „acceptable“. Its not great but you can use the image data to create larger plots. The Phantom 3 shots can be saved as DNG RAW Files and the camera can generate 5 shots with 0.7EV exposure difference. In post processing you’ll want to create CA free clean and sharp shots using a lens preset f.e. in LR for the DJI Phantom lens. This effectively removes chromatic aberrations and generates acceptable sharp shots. When you come from a full frame DSLR you might feel that the shots are sometimes a wee bit too soft. With the P3 you cannot adjust the aperture (wouldnt make much sense anyway as diffraction would quickly kick in) but you can increase exposure speed easily by upping the ISO. At ISO100 the camera is comparably noise free but increasing the ISO values isn’t very useful above ISO200 – you quickly remove details from your files.
After lens profile based corrections and sharpening I usually generate the HDR shot – in LR this creates another DNG where editing is than easier as you have slightly more dynamic range. So far I found it only useful when I shoot against the sun to avoid solarization. The dynamic range increase isnt helping too much with mid grey value dominated nadir kind of shots with low overall contrast.
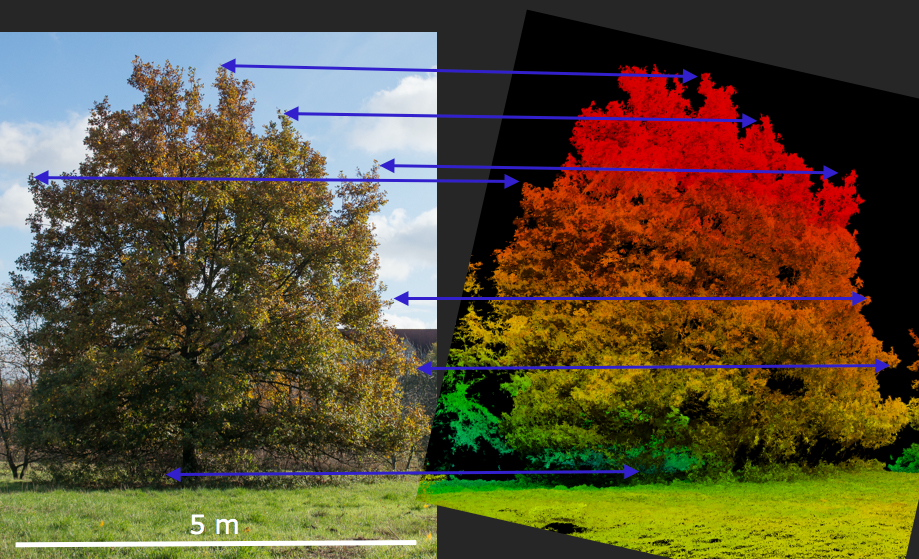
Photogrammetric mapping of larger areas and 3D point calculation of 3D Objects is done in Agisoft Photoscan. This is an easy to use professional photogrammetric software package, that also digests near range datasets. Agisoft aligns all photographs by using the Lat/Lon position of the shots and the relative barometric height information from the copter that was written into the metadata of the DNG Raw image files and searches for identical features in the overlapping imaged data. Detecting the feature offsets in different images the depth and height is calculated and a dense point cloud data set is generated that can be export to a binary LAS file. At that point within the workflow one can also create the digitale surface model (DSM) of the area and the image data mosaic (ortho level corrected). Georeferencing can be set to UTM WGS84 projection f.e. but height information needs some correction mainly because height is a relative barometric measurement and not GPS or ellipsoid derived (the copter doesnt know anything about the Ellipsoid/Geoid but the copter gets the GPS/GLONASS coordinates to get the lat/lon position right).
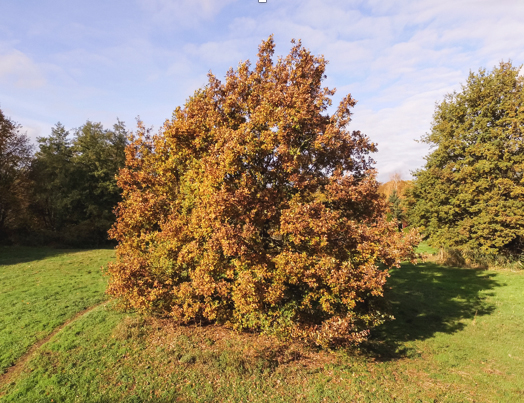
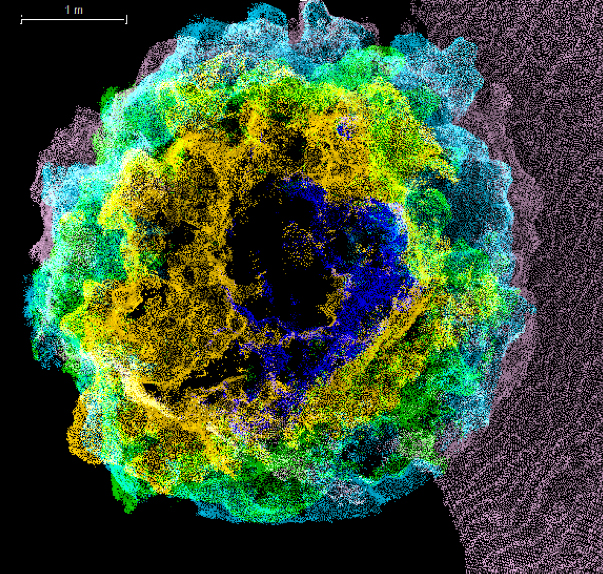
In consequence you can generate fascinating 3D object models. Some examples from recent flights within the canopy structure are included below.
The new Phantom 4 Pro that was announced in Nov. 2016 will likely be a game changer for the photogs because the 1 inch sensor with 20MP will provide more resolution and better dynamic range. The 24mm lens (84°) of the P4pro ist the best of both worlds and a good compromise between wide angle and enough overlap to create high res panoramas and large high res nadir image mosaics. Allthough I would prefer 28mm equivalent here. The filming options include 4k in 60fps.
The other aspects of the P4Pro series mainly iterate around longer flight times, better 3D obstacle sensing and some new gimmicks ala selfie shots and follow modes. The Inspire 1 also got an update to version 2 and is even a better tool for photographers and videographers. The speed of the technology-update cycles within the copter tech domain is just mind blowing. I guess the full DSLR capable copters will also come down to affordable prices in the next years.
Problems:
– P3A lens FOV is too wide (20mm) for high res data-mosaics (MavicPro/P4Pro are better – 28/24mm)
– The sensor is too small (X5 Zenmuse/Matrix/P4Pro are much better),
– The camera cannot be changed for a different high res model.
– Landing without catching is a problem (Phantom 3A).
– No emergency shutdown of engines (if copter capsizes at landing the engines can catch fire),
– continuous shooting can become slow in low temperatures (needs some checking with indoor temperatures).
Potentials:
– Low cost mapping of large areas in the visual spectral domain –& fine scale 3D point cloud calc. is possible /TLS competitor in close range applications if you have some DGPS reference points for more precise (and absolut height) georeferencing.
– LiveView with App and iOS/Android devices opens lots of applications – path mapping / orbiting / „Director“ solution pp – very fast growing App market.
– Matured technical concept/ it works! Control and gimbal stabilization work perfect, lifeview – telemetry – RTH are reliable.
– Its really fun! Go out map and generate your own data – georeferenced data on your desktop the same day!
– Very small packages that can easily be moved into the terrain and transported for longer hikes.
Stay tuned when I analyze the Phantom 4 Pro and compare the image quality. I will also talk about MC-Cases that seem to be the perfect case solution for the Phantom series.:
Best Apps:
- GO DJI (default control and flying software for DJI copter systems, no automatic waypoint mapping!)
- Altizure (cloud service) with Photogram.
- Pix4D Mapper Mesh (DJI) (yearly rental)
- FPV Camera for DJI
- Drone Deploy (commerical mapping with NDVI and volume calc.) photogram. subscription cloud comp.)
- Datamapper (commerical mapping with NDVI and volume calc.) photogram. subscription cloud comp.)
- Map Pilot for DJI by Maps Made Easy
- (Drone Director, Litchi for DJI)